
This week Rob let one of his hobbies go a little too far! Plus we’ll share a few of our favorite Maker Videos of the week, but first it’s time for a Maker Break!
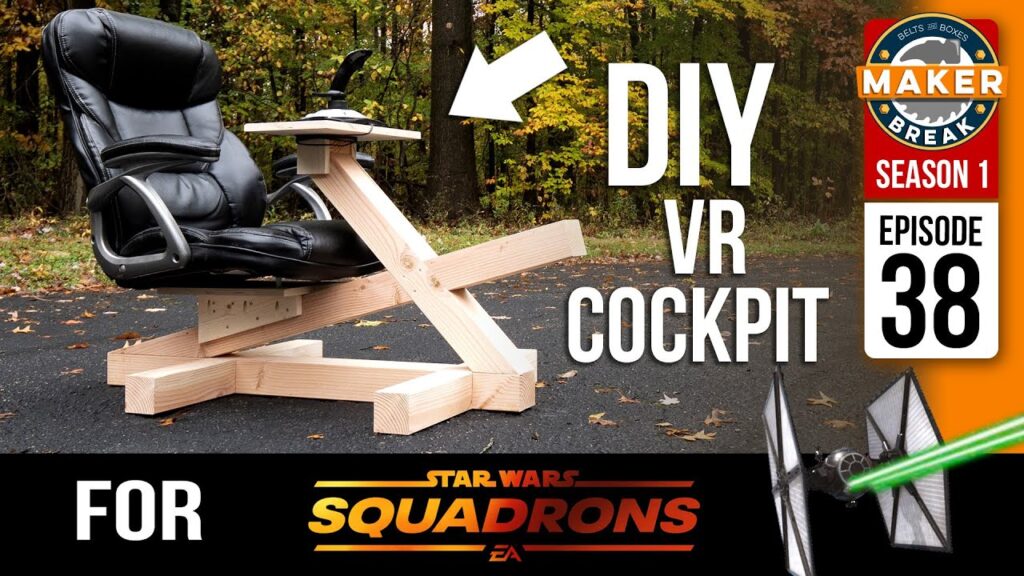
Star Wars fans will know that Squadrons, a PC game that lets you pilot X Wings and Tie Fighters, came out recently with full VR support, so naturally I needed to build a VR Cockpit.
Project of the Week
Ok I get it, this is pretty geeky, but I do love this stuff, and building my own VR cockpit was super fun. I love VR, or Virtual Reality. I also love star wars. So when Star Wars came to VR in the form of a flight simulator called Squadrons, well, I had to do something about it. In the game you fly Tie Fighters and Xwings in space combat, and yeah, it doesn’t get any less nerdy from here, so feel free to back out now if you can’t handle it.
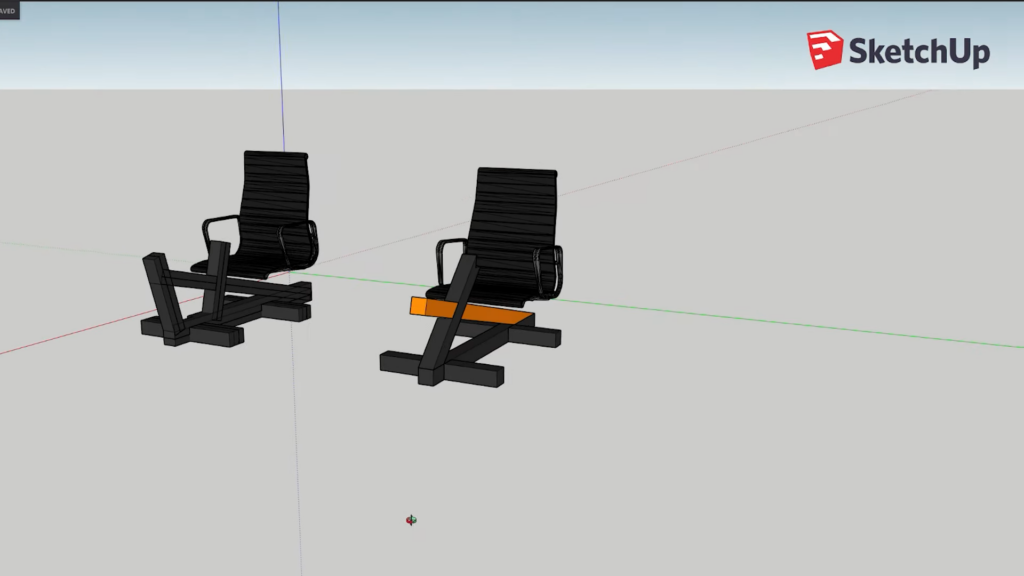
Anyways, I needed a way to comfortably use a joystick in VR, so I started researching cockpits. There are a ton of designs out there, but I didn’t like any of them. So I decided to design my own. I have GOT to stop doing this. The reality is, I have an Iggy swan imagination, but well, rob smith skills and tools. You’ll understand in a moment.
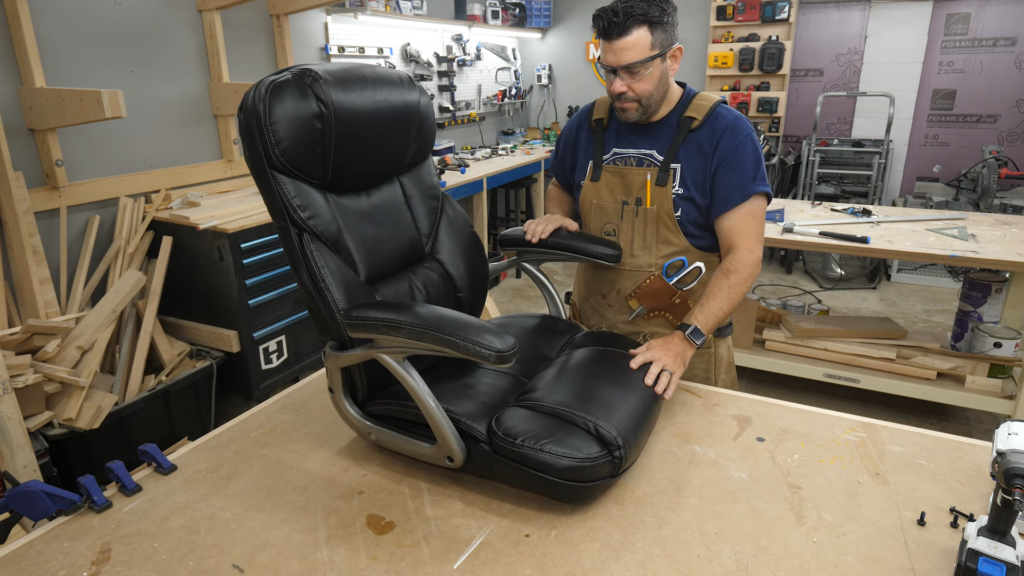
Anyways, I started off with this old manager’s chair I had in our garage. I took the base off, and immediately knew this was a bad idea. The whole thing is held together by the arms, which are going to make it impossible to get in and out of this thing, but it’s what I have.
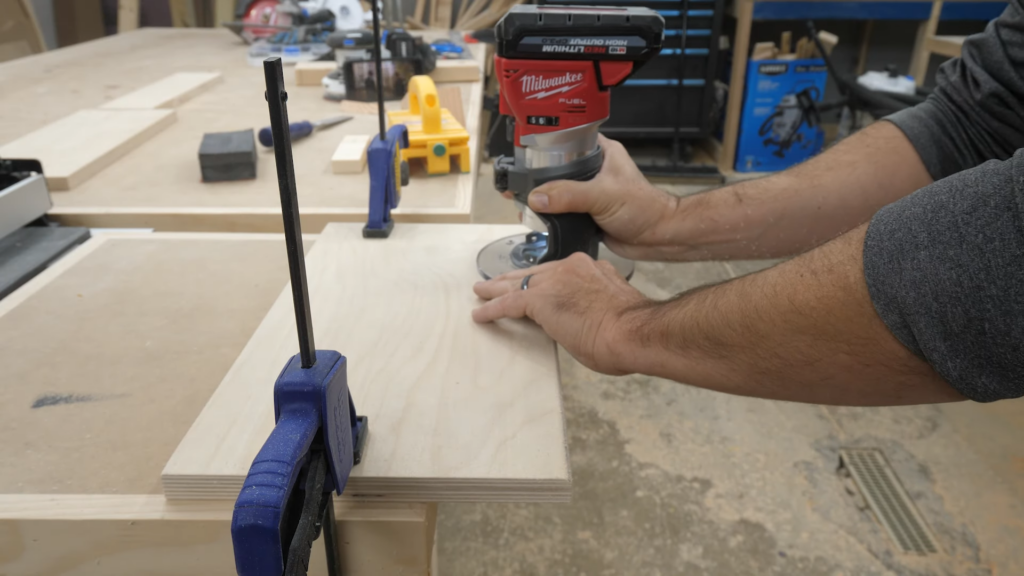
I tested it out on the bench, and it seemed to be good enough. I used that ruler to make sure my made up dimensions would work. Then it was time to get cutting. Every other design I found was based on a huge box you sat inside, and I felt like there was a better way.
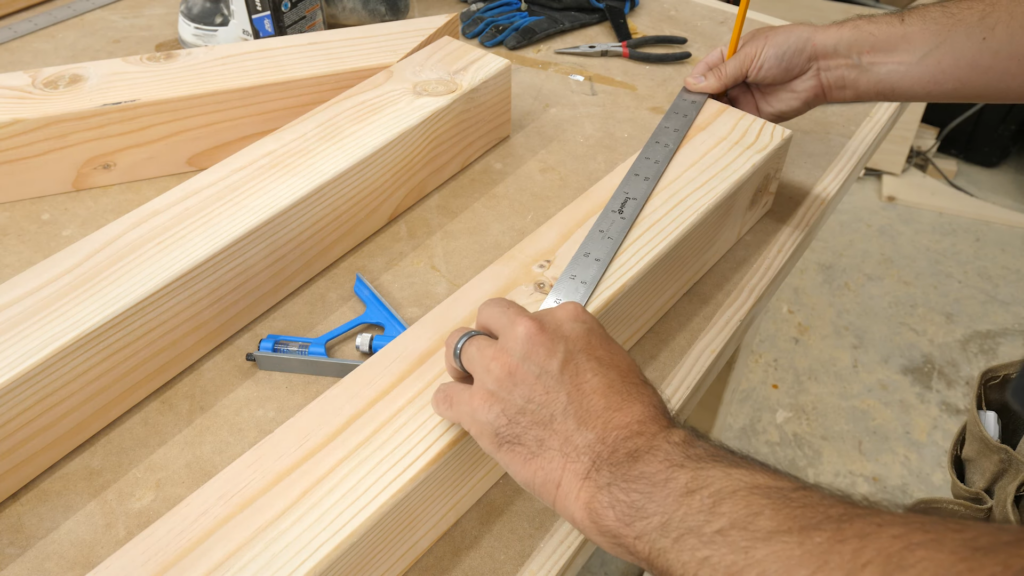
I decided I wanted to build a simple frame with 4x4s. I found a couple at Home Depot that were in rough shape, but my neighbor was kind enough to plane down for me to make them more square. Thanks Mark!
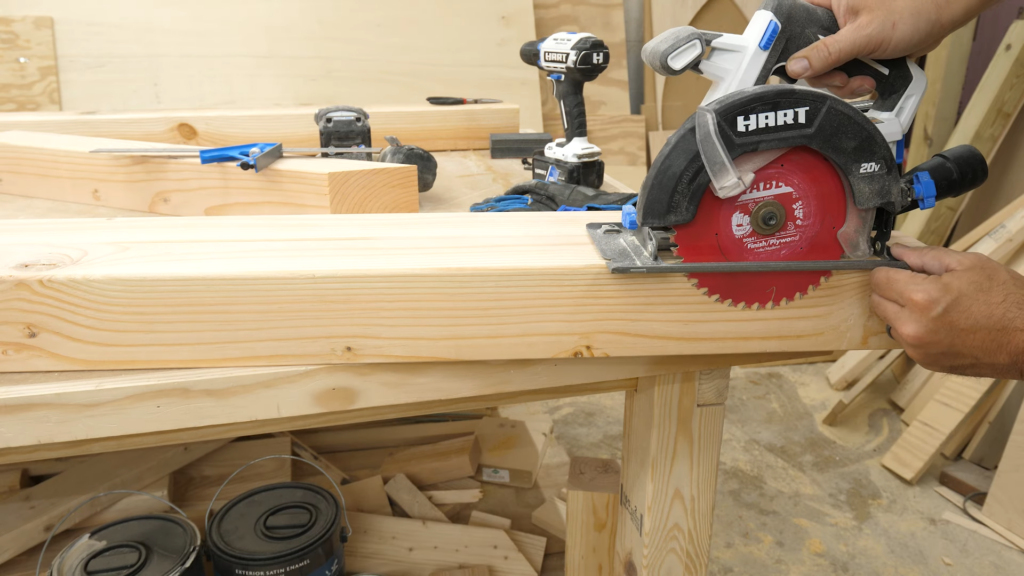
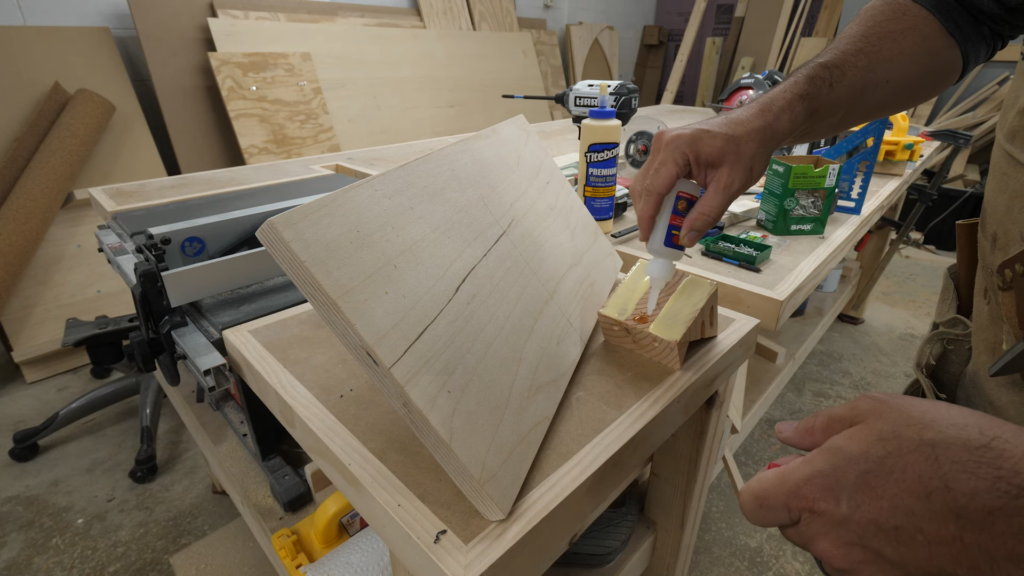
The first angled cut is this insanely long 15 degree monster. A band saw would be perfect for something like this, but yeah, I don’t have that. So instead I tackled it with my circular saw, which worked fine. Cut from both sides, and done. The other angle was a 45 degree miter, which I made on our miter saw. With those cut, I lined them up with the base, and marked the half lap joint.
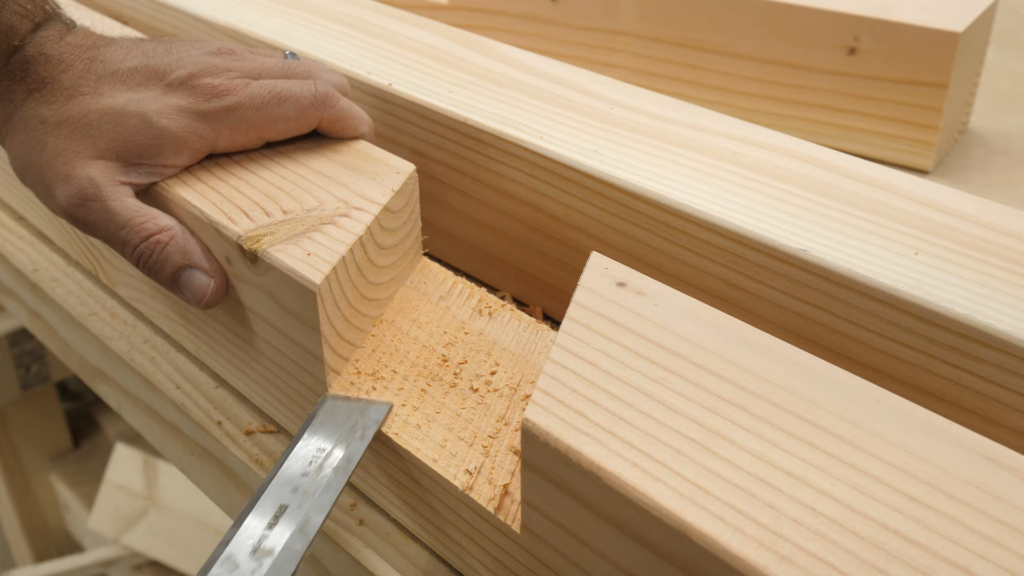
We borrowed a sliding miter saw to cut the notches. To keep our assembly tables clear, I decided to use it on our new HART work table. Boy is that thing awesome. It’s super light and portable. Sets up in a few seconds, and can support something like 1500 lbs.
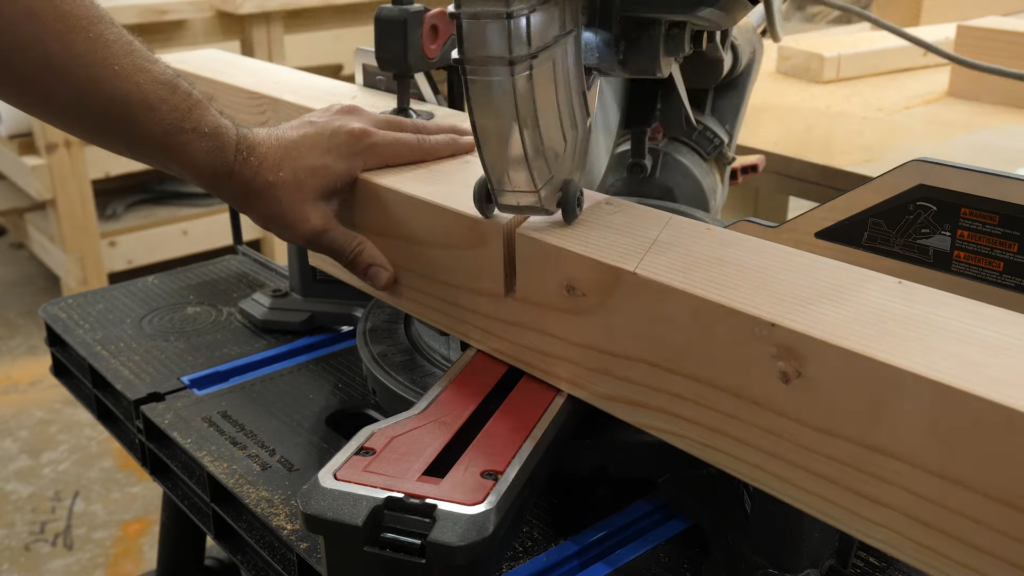
I set the depth stop and cut out my notches. Then I got to break out the left over, and chisel out the waste. I had to make a couple adjustment cuts but eventually it went together
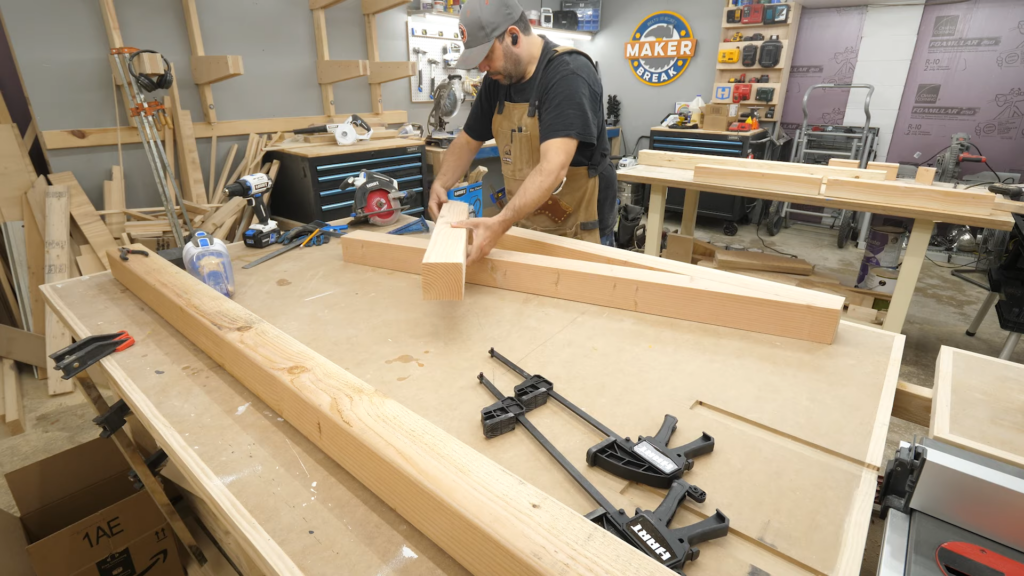
I put all the parts in place, and immediately started screwing things together. I really wish I had thought to screw this in from the bottom. But I didn’t. Meh. I used clamps to hold them together while I pre drilled and then screwed them down. I then realized I had yet to screw together the base, so I flipped that and I DID screw that in from the bottom.
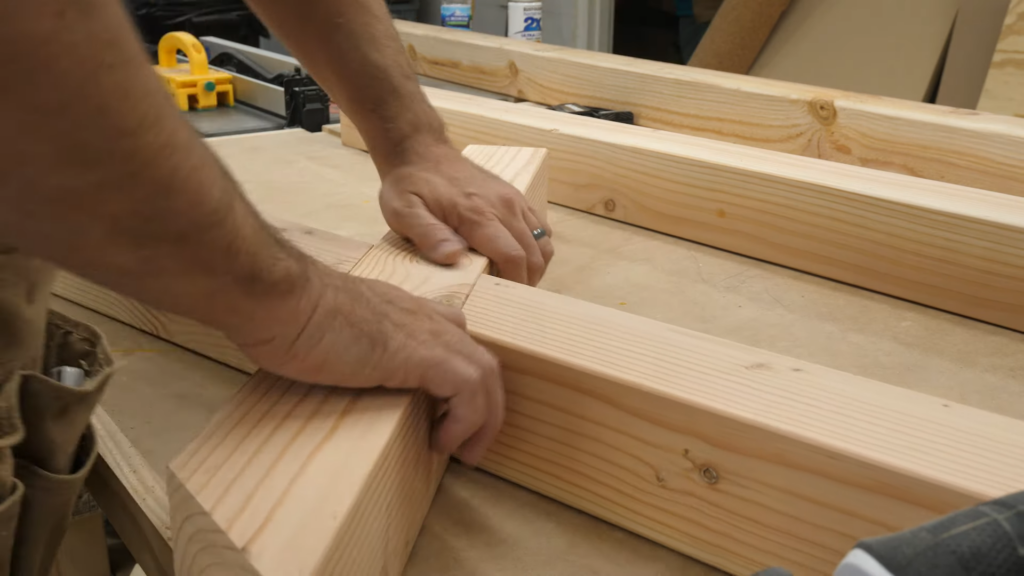
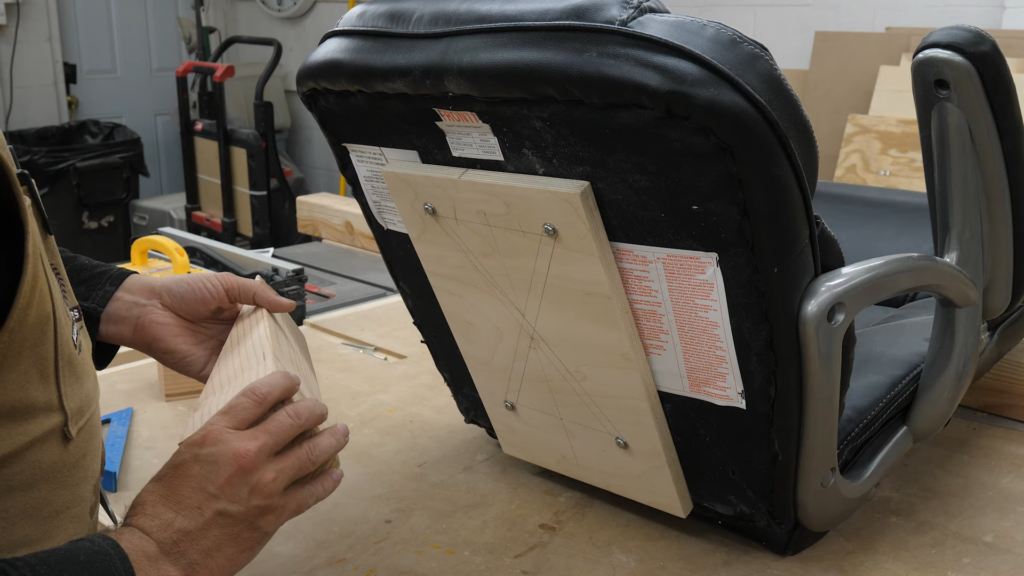
Next I screwed together the vertical pieces, and then rescrewed them into the base. Finally, I had the base where I wanted it. Back to the chair. I had the base plate on the bottom already, and used a ruler to find my center line. The I decided I needed to level out the chair, so I grabbed my 15 degree cut off wedge, and realized it would work perfectly for the chair.
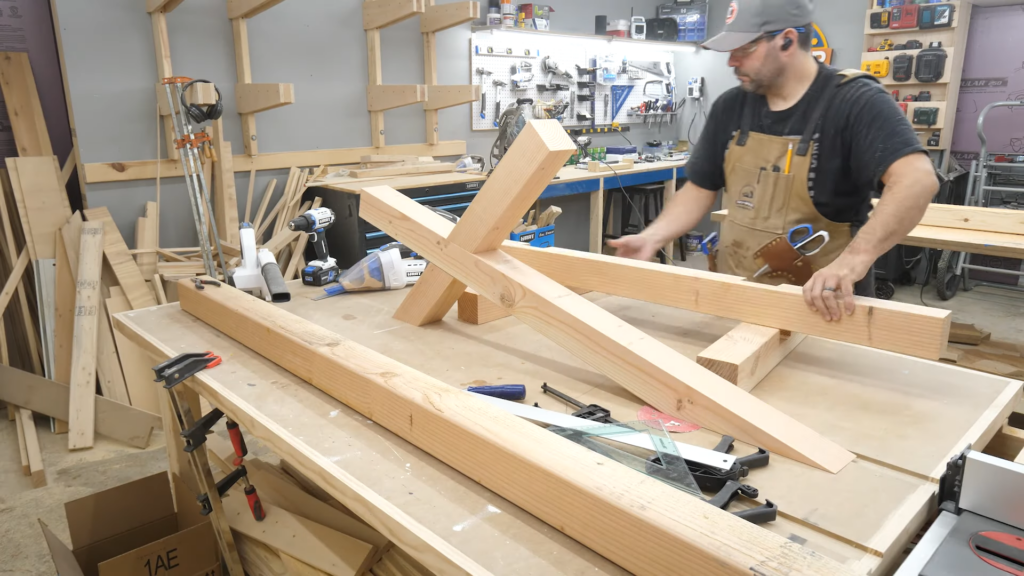
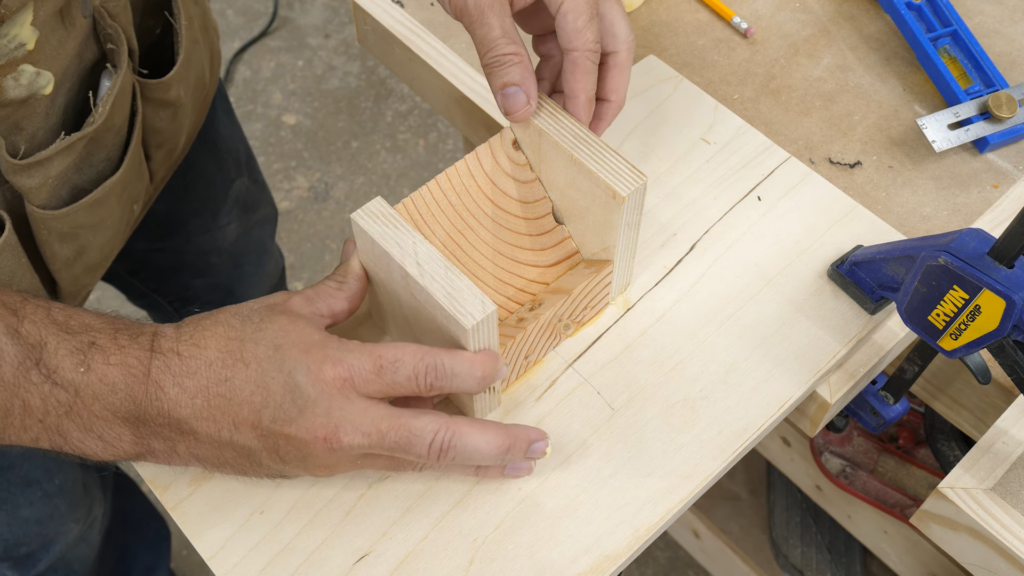
That would sit directly on top of the vertical support, but I needed something to keep it from rocking back and forth, so I measured out some ¾” pine I had to make side supports and cut them with my circular saw. After I had one I used it as a template to cut the other.
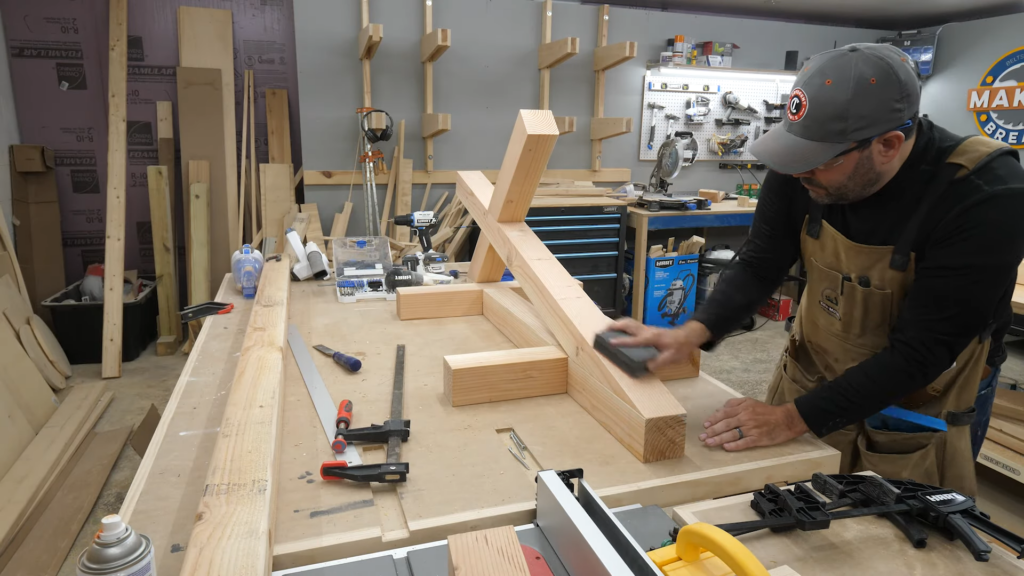
I decided to screw the side pieces into the wedge. Then I decided to see how it fit. It took a bit of sanding, but I was really happy with how well it turned out. I then used pocket screws to attach it to the base under the chair.
I brought the chair back over to the base to put it in place, but something was wrong. I didn’t realize the front of the chair turns down, meaning it would never fit. You can see me realize it at this very moment when I’m like “Crud”. Yeah, that’s the word I used.
To fix this, I ran to Home Depot and grabbed a few spacers and washers and cut some new holes, and well, it works.

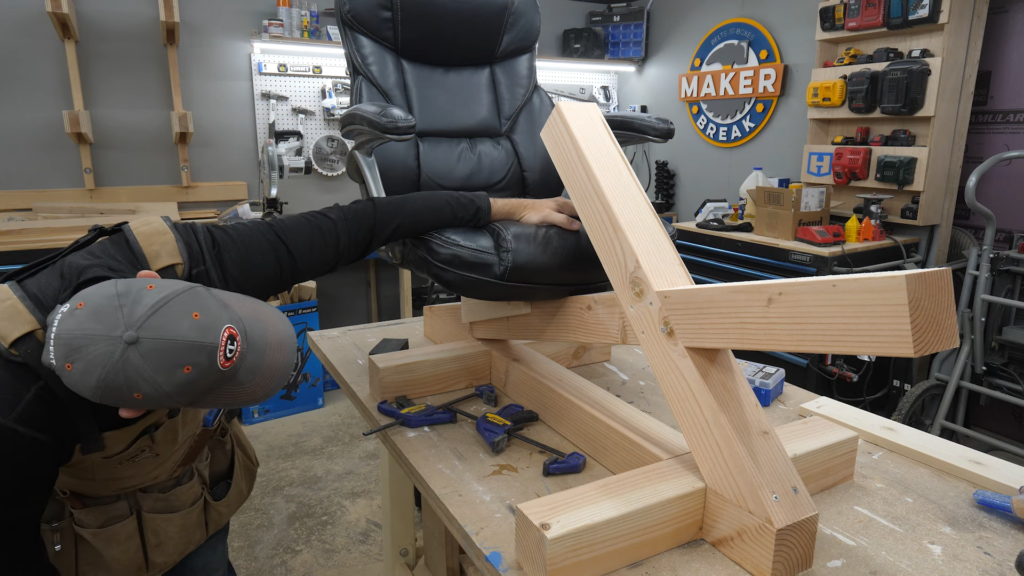
Next I put the whole thing on the floor so I could adjust the seat location. I also made that block for the top of the stem that would eventually hold the joystick. This was working out well so far!
With the chair in place, I screwed it into the base. So yeah, this first version isn’t adjustable, but I’m sure my kids love watching Dad play videogames.
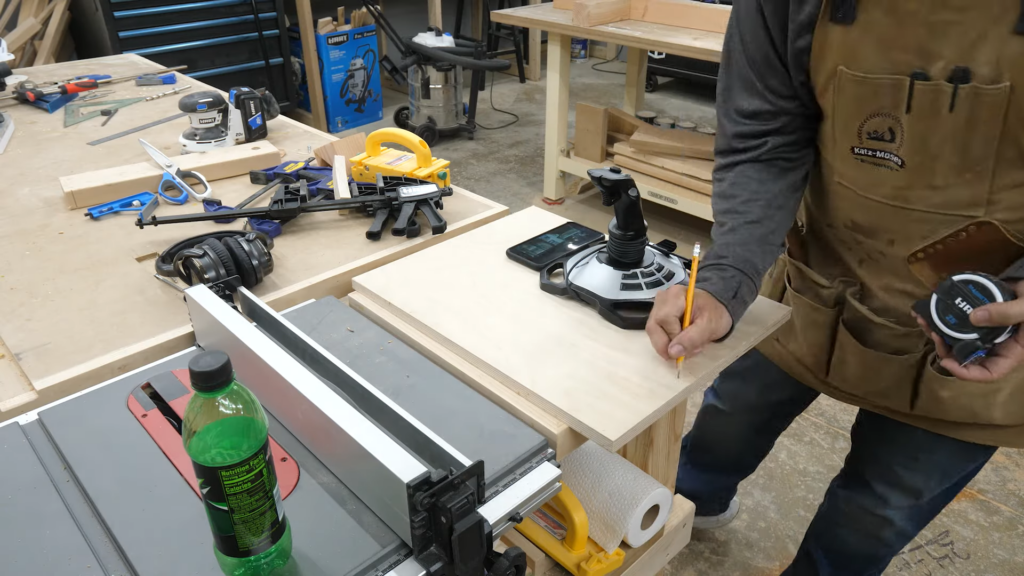
Eventually I plan to have multiple attachments for keyboards, and racing wheels, but for now I needed a top for the joystick, and left room for my phone, mainly so I could call for help when I struggled to get out of this thing.
I cut it down to size on the table saw and routed over the front edge where my wrists would be.

This joystick doesn’t have any mounting points, so I just screwed through the plastic base. This worked.
Pro tip, don’t screw the joystick to the plate before you figure out the mounting system below. I ended up marking off the center, and then used a combination of wood glue and super glue to hold it in place. Then I used a couple pocket screws to hold it permanently.
On it’s own, this sat nicely on the stem. But to make it fit more snugly. Is snugly a word? I cut two more pieces to attach to either side. I just used glue to hold those in place.
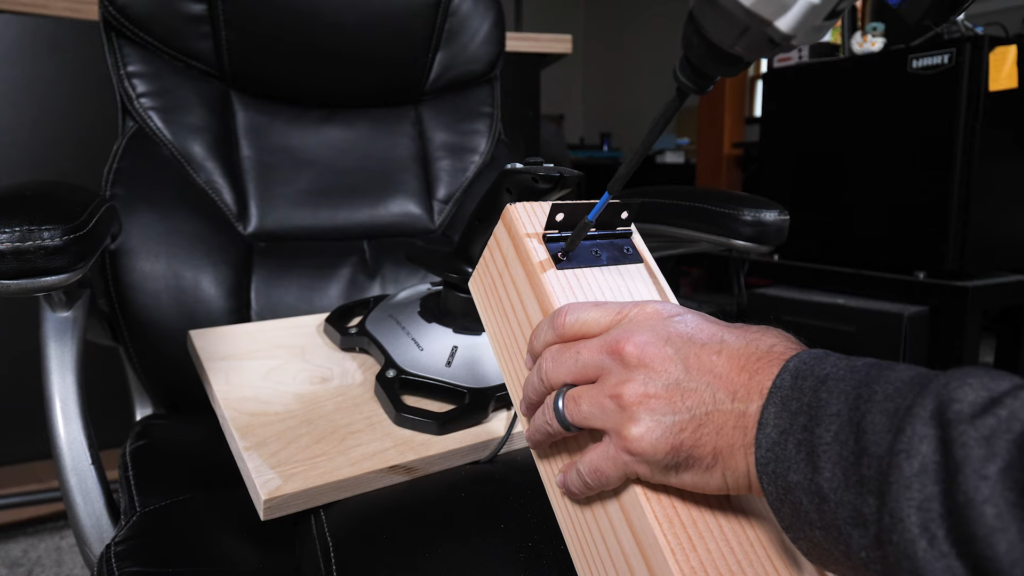
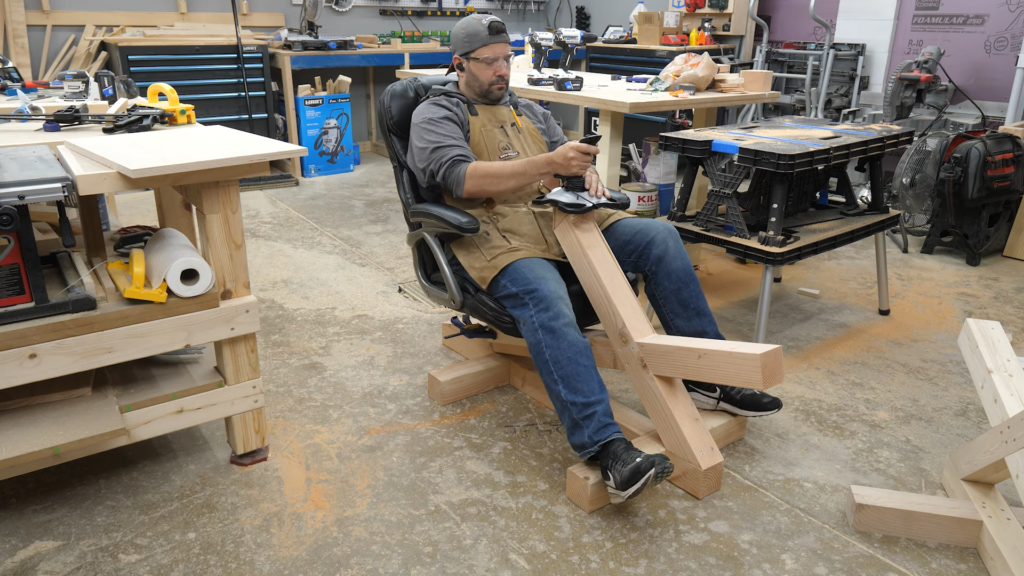
I brought the whole thing up to our studio and used a hinge to attach the joystick. This was stupid. I thought I’d make it easier for me to get in and out, which it does… a little I guess, but the reality is I need to get a chair without arms. Oh well.
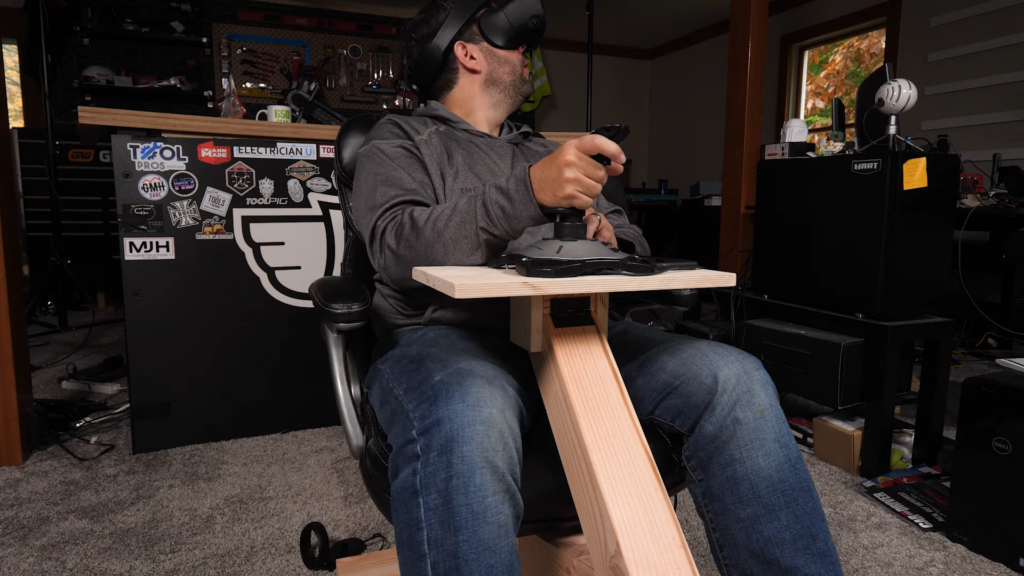
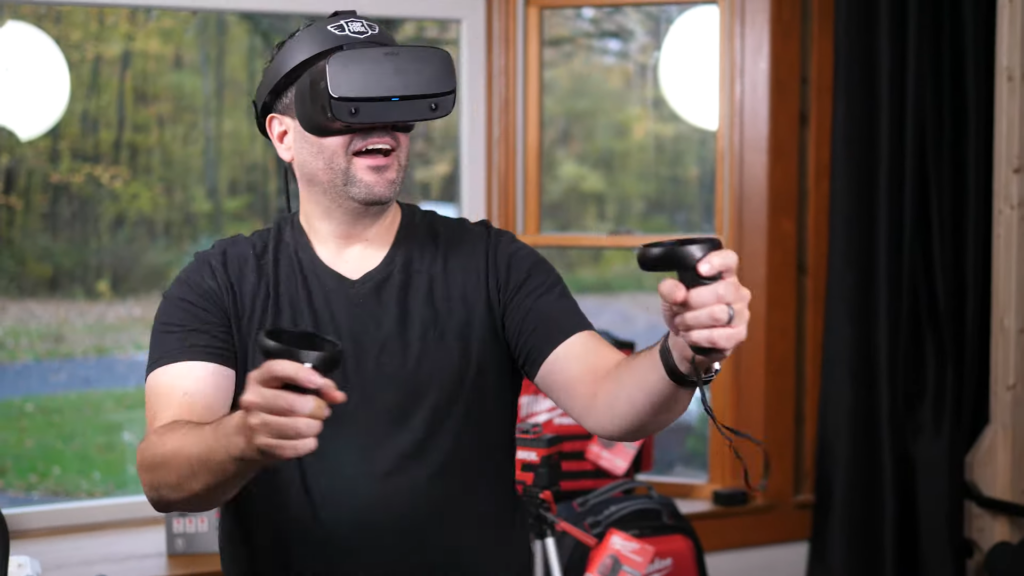
Eventually I got in, geared up, and headed into space…..Wait, I know I look stupid, but in my head, THIS is happening.

Oh leave me alone. This is fun!
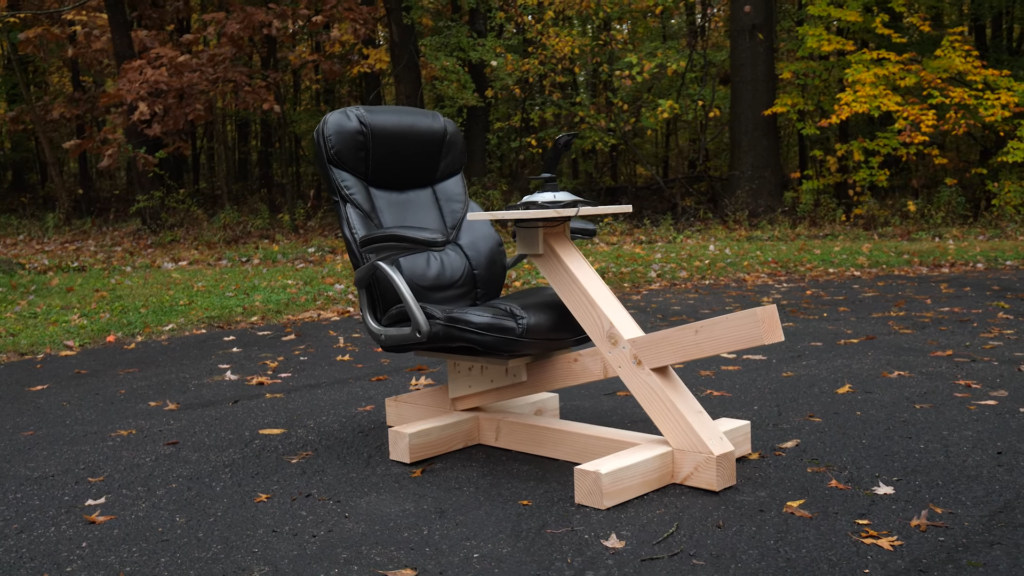
So this thing is NOT perfect. Wrong chair, it doesn’t adjust, and that center column needs to rotate out of the way. But I enjoyed designing something of my own, however imperfect, and my next version will be WAY better.
Favorite Maker Videos of the Week!
Lets share a few of our favorite maker videos before we go. First up, Once Upon a Workbench shared this amazing playhouse build, that looks like it was torn right out of The Legend of Zelda, Breath of the Wild.
If you’re like me and sometimes you just like to watch people make insanely cool stuff in time lapse while generic happy music plays, the Samurai Carpenter shared the build of his new workshop doors, and like just about everything else this guy does, they turn out amazing.
And we stopped back at Spencley Design Co again to find this beautiful end table that matches his dining table he built a few weeks ago. You should check out both of them.
Thank you HART for sponsoring this episode! We could not do what we do without you.

